Understanding DIY Skin Tag Removal Kits: Freezing vs. Cutting
Skin tags, those small, soft, benign growths that often appear on areas where skin rubs against skin or clothing, are incredibly common. While harmless, many individuals find them aesthetically bothersome or irritating, especially when they catch on jewelry or clothing. For a long time, their removal primarily fell to dermatologists. However, thanks to ongoing research and technological advancements, a variety of
safe at-home skin tag removal solutions have emerged, leading to the development of specialized DIY
skin tag removal kit options. These kits empower individuals to address these growths in the comfort and privacy of their own homes.
The landscape of at-home skin tag removal largely revolves around two primary methodologies: freezing (cryotherapy) and cutting (excision). Each method comes with its own set of tools, instructions, advantages, and precautions. This article will delve into the intricacies of both approaches, helping you understand what to expect from a DIY
skin tag removal kit and how to choose the right one for your needs while prioritizing safety and effectiveness.
Exploring the Components of a Typical Skin Tag Removal Kit
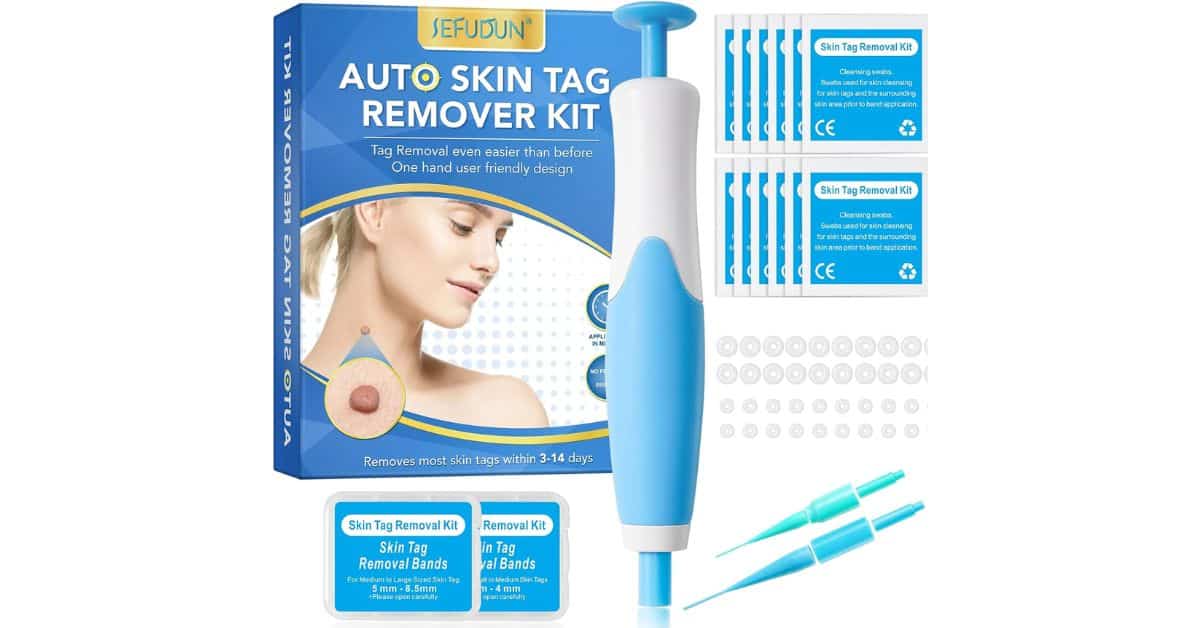
A modern
skin tag removal kit is designed to be user-friendly, containing the necessary equipment to tackle skin tags without requiring extensive medical training. The contents can vary significantly depending on whether the kit specializes in freezing or cutting.
For freezing methods, you'll typically find devices that facilitate cryotherapy. Some older or simpler kits might include specialized tweezers designed to hold the base of a skin tag, which you would then dip into a cryogen (like liquid nitrogen, though this is less common for consumer kits due to safety concerns, often replaced by proprietary cooling agents). More advanced and popular cryotherapy kits, such as the
Claritag Advanced, come as fully assembled, pre-loaded devices. These innovations make the process incredibly streamlined, with treatment heads already integrated, ready for repeat single-person use. These advanced kits are often developed by dermatologists, focusing on delivering professional-grade results with minimal discomfort and maximum convenience.
For cutting methods, a basic
skin tag removal kit might contain simple, sterile instruments like fine-point scissors or even a specialized nail cutter, alongside tweezers for grasping the tag. While seemingly straightforward, the cutting method carries distinct considerations for sterility and potential discomfort, which we will explore in detail. Regardless of the method, the core principle behind these kits is to provide accessible tools for effective skin tag management.
The Freezing Method (Cryotherapy): A Gentle Approach to Removal
Cryotherapy, the process of removing skin tags by freezing them, is a highly popular and often preferred method for at-home use due to its relative non-invasiveness and effectiveness. When you opt for a cryotherapy
skin tag removal kit, you're essentially applying extreme cold to the skin tag, which disrupts the blood supply and destroys the cells within the growth.
How Cryotherapy Kits Work
The mechanism behind freezing a skin tag is quite ingenious. When the extremely cold applicator or solution comes into contact with the skin tag, it causes the cells to freeze and crystallize. This process effectively kills the tissue, leading the skin tag to shrivel, darken, and eventually fall off within a few days to a couple of weeks.
Advanced kits, like the Claritag Advanced, exemplify the modern cryotherapy approach. These devices are often pre-loaded with a unique cryo-freeze technology, activated by pushing down on the device. A typical treatment cycle might involve:
- Activating the device.
- Freezing the skin tag for approximately 20 seconds.
- Removing the device for 20 seconds to allow for re-circulation.
- Re-activating the device.
- Freezing for another 20 seconds.
This multi-stage freezing approach ensures thorough treatment, often achieving effective removal in just one treatment cycle. The device is designed for precision, targeting only the skin tag without significantly affecting the surrounding healthy skin.
Advantages of Freezing Skin Tags at Home
There are several compelling reasons why the freezing method is often recommended for DIY skin tag removal:
- Minimal Discomfort: While you might feel a mild stinging or tingling sensation during and immediately after application, it is generally less painful than cutting and often dissipates quickly.
- Reduced Risk of Bleeding: Because the method doesn't involve cutting the skin, there is virtually no risk of bleeding, which is a significant advantage for at-home use.
- Lower Infection Risk: Without an open wound, the chances of infection are considerably reduced, especially when following proper hygiene protocols.
- Effective for Various Sizes: Cryotherapy can be effective for a range of skin tag sizes, though larger tags might require more than one application or a longer freezing duration as per kit instructions.
- Professional Results: Many dermatologist-developed cryo-freeze kits aim to deliver results comparable to those achieved in a clinical setting, making them a popular choice for achieving a smooth, clear complexion.
Important Considerations for Cryotherapy Kits
While highly effective, it's crucial to understand the limitations and safety guidelines for cryotherapy:
- Target Specificity: As noted by manufacturers like Claritag, these devices are designed specifically for skin tags. They are *not* effective for moles or warts and should not be used on them. Misdiagnosis can lead to ineffective treatment or even worsen an underlying condition.
- Location Restrictions: Never use a Claritag Advanced: FDA-Cleared Cryo-Freeze Skin Tag Removal kit on or near the eyes and eyelids, or on mucous membranes. Always consult a physician for tags in sensitive areas.
- Age Restrictions: Some advanced kits have age restrictions; for instance, Claritag Advanced is only approved for ages 21+. Always check the instructions for use.
- Patience is Key: Unlike cutting, which offers immediate removal, freezing requires patience. The skin tag won't fall off instantly but will gradually die and detach over several days or weeks.
The Cutting Method (Excision): A More Direct Approach
The cutting method for skin tag removal involves physically snipping or cutting off the growth from its base. While it offers immediate removal, it is generally considered a more invasive option for home use compared to freezing.
Common Tools and Techniques for Excision
A basic
skin tag removal kit focused on excision might include:
- Tweezers: To firmly grasp the base of the skin tag, lifting it away from the surrounding skin.
- Sterile Scissors or Nail Cutters: Fine-tipped, sharp, and sterile instruments used to snip the tag at its stalk. Some kits may provide specialized, very small cutting implements.
The technique involves isolating the skin tag, holding it firmly with tweezers, and then carefully cutting it at its very base, where it attaches to the skin. The goal is to remove the entire tag with one swift, clean cut.
Pros and Cons of Cutting Skin Tags at Home
The cutting method has distinct advantages and disadvantages:
- Pro: Immediate Removal: If performed successfully, the skin tag is removed instantly.
- Con: Higher Risk of Bleeding: Cutting inherently breaks the skin, leading to bleeding, which can range from minor to more significant, especially if the tag has a larger blood supply.
- Con: Increased Risk of Infection: An open wound is a direct pathway for bacteria. Without strict sterility and proper wound care, the risk of infection is higher.
- Con: Potential for Scarring: Improper cutting or post-treatment infection can lead to visible scarring.
- Con: Discomfort and Pain: Cutting is generally more painful than freezing, and local anesthesia isn't typically available in home kits.
- Con: Requires Precision: A steady hand and good visibility are essential to avoid cutting healthy skin or leaving a portion of the tag behind.
Crucial Safety Measures for Excision
Given the risks, if considering the cutting method, safety is paramount:
- Absolute Sterility: Every tool used must be thoroughly sterilized before and after use. This means more than just a quick wipe; medical-grade sterilization is ideal. Without it, you introduce a high risk of bacterial infection.
- Proper Disinfection: The skin area around the tag must be thoroughly cleaned and disinfected before attempting removal.
- Wound Care: Have antiseptic solutions and sterile bandages ready for immediate post-procedure wound care.
- Consultation: It's highly advisable to consult a healthcare professional before attempting to cut off a skin tag yourself, especially if it's large, bleeding, or located in a sensitive area.
Crucial Safety Guidelines for DIY Skin Tag Removal Kits
Regardless of whether you choose a freezing or cutting
skin tag removal kit, safety should always be your top priority. Improper use can lead to complications such as infection, scarring, pain, or even misdiagnosis of a more serious skin condition.
Sterility is Paramount
For any home procedure involving skin breakage or exposure, sterility is non-negotiable. If your kit contains reusable tools, they *must* be sterilized before every use and immediately after. Sharing tools with anyone else is an absolute no-go; it drastically increases the risk of spreading infections. Always follow the specific sterilization instructions provided in your kit's manual. For single-use applicators, ensure they are sealed and undamaged before use.
Read Instructions Meticulously
Every
skin tag removal kit comes with a detailed instruction manual. Do not skip this step. Read it thoroughly, understand each step, and follow the guidelines precisely. This includes knowing the correct application time for freezing devices, proper tool handling for cutting kits, and specific post-treatment care. The Claritag Advanced kit, for instance, comes with a newly designed IFU (Instructions for Use) manual with simple, how-to pictorials, emphasizing ease of understanding.
Know When to Seek Professional Help
DIY kits are great for common, benign skin tags. However, there are scenarios where professional medical advice is essential:
- Uncertainty about the Growth: If you are unsure whether the growth is actually a skin tag, a mole, a wart, or something else entirely, *do not attempt removal yourself*. A dermatologist can accurately diagnose and recommend the appropriate treatment. Using a skin tag kit on a mole could be dangerous.
- Large or Deep Tags: Very large or deeply rooted skin tags are best handled by a professional to minimize scarring and ensure complete removal.
- Painful, Bleeding, or Changing Tags: Any skin growth that is painful, bleeding, rapidly changing in size or color, or has irregular borders should be evaluated by a doctor immediately.
- Sensitive Areas: Skin tags on the face, eyelids, genitals, or other sensitive areas require professional attention to avoid injury or complications.
- Underlying Health Conditions: If you have conditions like diabetes, circulatory issues, or a compromised immune system, consult your doctor before using any home removal kit.
Post-Treatment Care
After removing a skin tag, keep the treated area clean and protected. For freezing methods, the area might blister or scab before the tag falls off; keep it clean and allow it to heal naturally. For cutting methods, apply an antiseptic and a sterile bandage, changing it regularly until the wound closes. Watch for any signs of infection, such as increased redness, swelling, pus, or fever, and seek medical attention if these occur.
Conclusion
DIY
skin tag removal kit options offer a convenient and often effective way to address these common skin growths from home. Both freezing (cryotherapy) and cutting (excision) methods are available, each with its own benefits and considerations. Freezing kits, particularly advanced, dermatologist-developed cryo-freeze systems like Claritag Advanced, tend to be less invasive, carry a lower risk of bleeding and infection, and provide excellent results for many individuals. While cutting kits offer immediate removal, they demand rigorous sterility and carry higher risks of bleeding, infection, and scarring. Regardless of the method chosen, prioritizing safety, meticulously following instructions, ensuring complete sterility of tools, and knowing when to consult a healthcare professional are paramount. With careful consideration and adherence to guidelines, you can effectively manage skin tags and enjoy clearer, smoother skin. You can typically find these kits at utility or drug stores, or through online retailers.